Learning Photography | Shutter Speed
This post contains affiliate links.
The world of photography can sometimes become very confusing. In order to shoot in manual mode like the pros do, you first need to understand the basics of how to use your camera and what all those buttons mean. In this article, we are going to address shutter speed. Happy learning!!
There are 3 components that define manual exposure: ISO, Aperture, and Shutter Speed.
Shutter Speed can be defined as the length of time the camera’s shutter stays open to allow light into the camera’s sensor. Think of it like a pair of curtains on a window. You open the curtains and light comes in. If you open the curtains for 2 seconds, more light will come in than if you only open the curtains for 1/2 a second. Make sense?
The shutter on a camera works exactly the same way – the longer the shutter (curtain) is open, the more light it will let into the camera’s sensor, so the brighter your photograph will be.
But what’s the benefit of being able to adjust your shutter speed? The simple answer is that it allows you to capture motion.
 In the 2 photographs that you see above, you can see that in the first photo the water seems to be still – not really moving much at all. My fast shutter speed of 1/4 second allowed me to “freeze” the movement of the water. However, in the second picture I set my shutter speed at 1 second – much slower than 1/4 of a second, and you can see that the water seems to be moving or flowing. Which image do you prefer? Both have exactly the same composition – the only difference is the illusion of movement caused by my shutter speed adjustment.

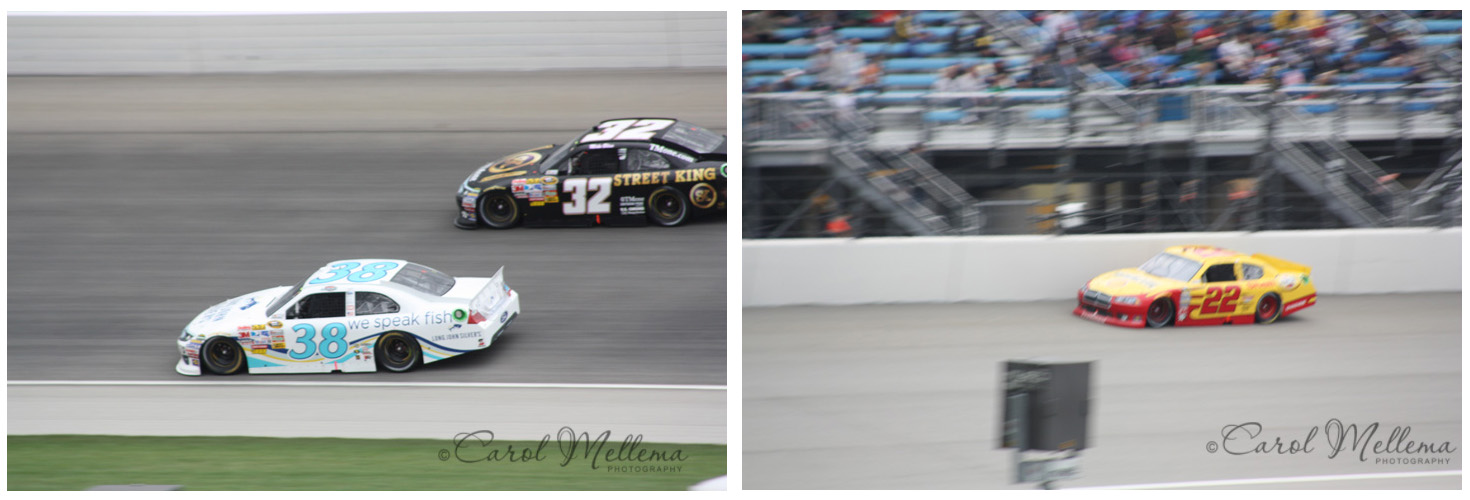
The same can be said for the NASCAR photos – in the first image I used a much faster shutter speed and froze the action, whereas in the second image my shutter speed was a bit slower and you can see the movement in the car and in the stands in the background . This is called “panning” – where you follow the movement of the object with your camera as you shoot the photograph. For example, these cars were moving close to 200 miles an hour when I took these photos! But I moved my self and my camera right along with the cars in order to get a sharp shot.
One caveat: If you are going to photograph at slow shutter speeds, your camera MUST be mounted on a tripod, otherwise you will just end up with a blurry mess! I recommend a good, sturdy but lightweight carbon fiber tripod such as this one, with a good ball head with quick release such as this one. For more information on my recommendations for what every budding photographer needs to get started, see my article “5 Things Every Budding Photographer Needs“. It gives you basic information on the bare minimum things you need to get started taking great photos without breaking the bank!
Want to learn more about The Basics of Photography? See my e-book HERE! It’s a great little e-book to get you started taking control of your camera!
If you have enjoyed this article, please share it with your friends on Facebook, Pinterest or Twitter! Thanks bunches!! 🙂
This post contains affiliate links, which means if you purchase a product through one of my links, I make a small commission, which allows me to continue travelling and photographing this beautiful world! Thank you for supporting this small business! 🙂
